Introduction:
There are two goals of any application: acquire as many customers as possible or deliver highest quality engagement within a target market. So integrating your app with any social media will fulfill your goal.
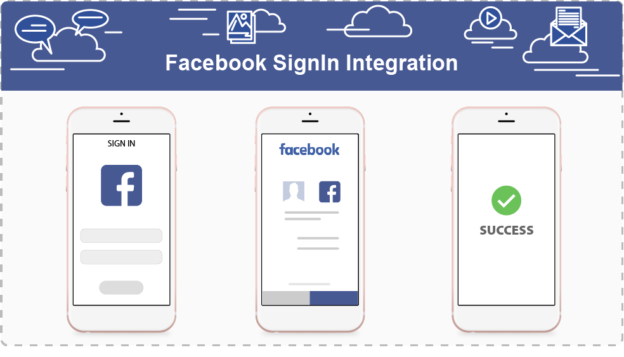
Here we will know about how to authenticate a user with social media like Facebook in his application.
Various steps that you need to follow to do Facebook Integration in Swift 3.0 in your app are:
- Open Xcode and create a new Single View Application.
- Go to https://developers.facebook.com and login with your account. It will open Facebook dashboard.
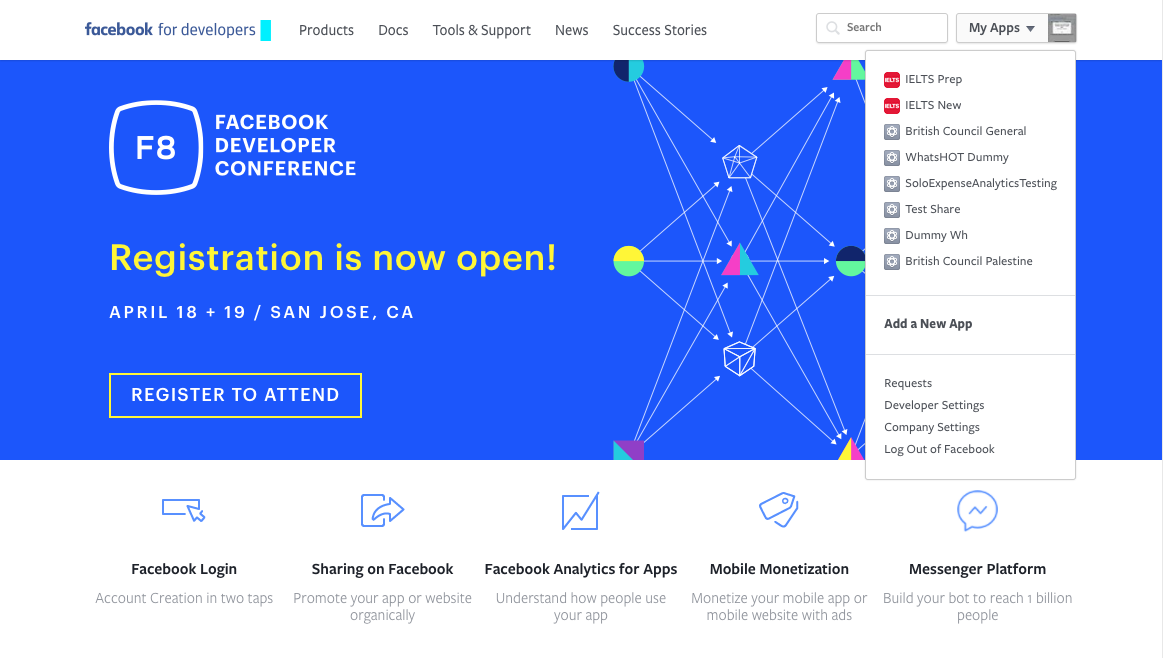
- Now click on ‘My Apps’ from the top right view. A following page is opened.

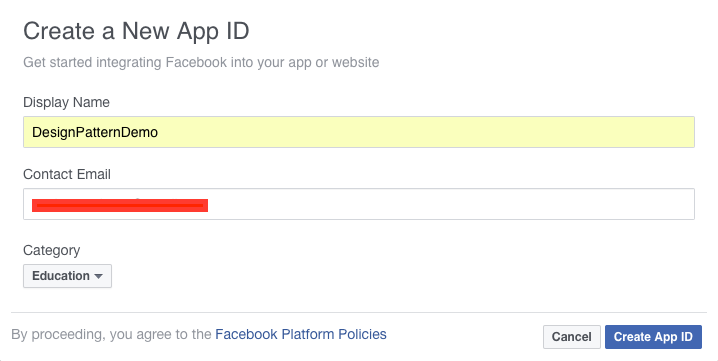
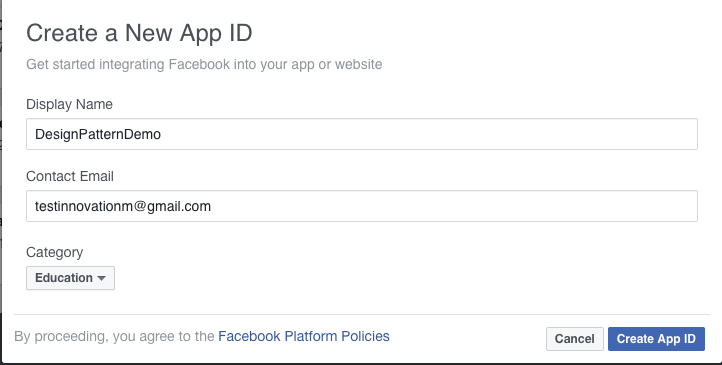
- From here, Click on + Add a New App if your application is not registered with the Facebook. When you do so, a form is opened.
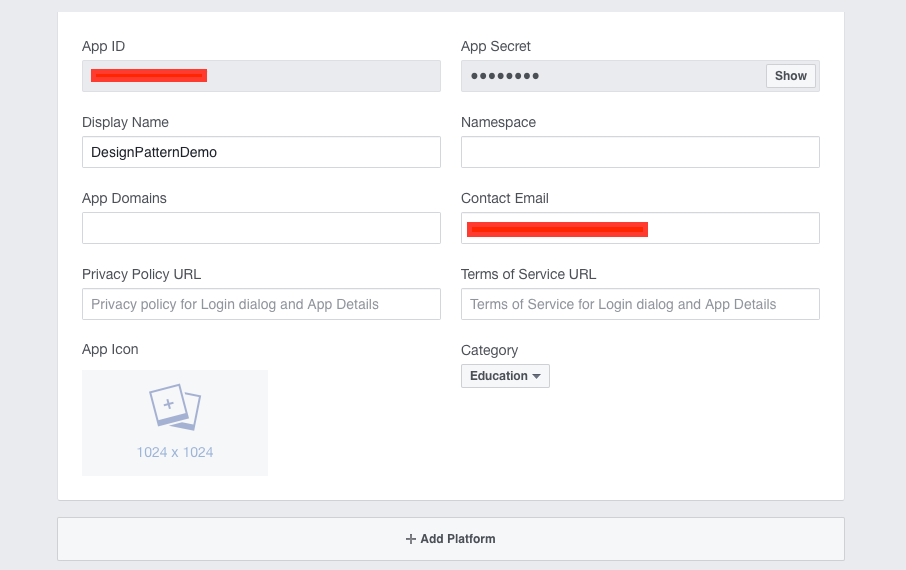
Now fill application details: - Click on Create App ID. It will register your app with the Facebook.
- The next step is to enable the app login from iOS. Click on the Settings option in the left menu, and in the main area click on the +Add Platform big button.
- In the new window, select the iOS platform. It will open the detailed view for iOS to enter the details of your application.
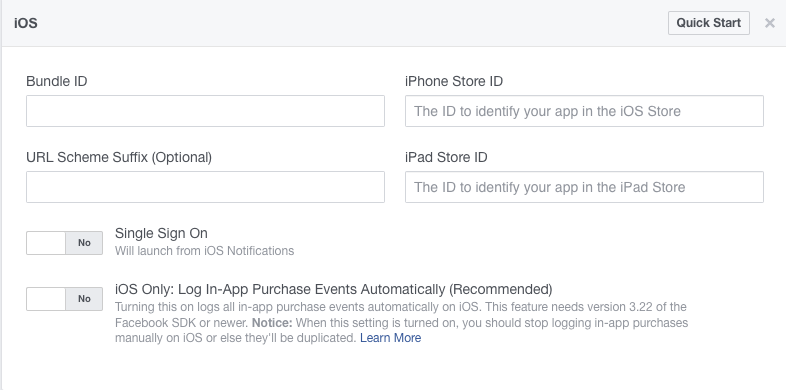 Now you need to fill all the details.
 - In the Bundle ID field, it’s very important to enter the exact same to the project’s Bundle Identifier value, otherwise the app users won’t be able to be authorized.
So, go back to your Xcode project and click on the project target on the Project Navigator pane, and under the General tab copy the value of the Bundle Identifier field.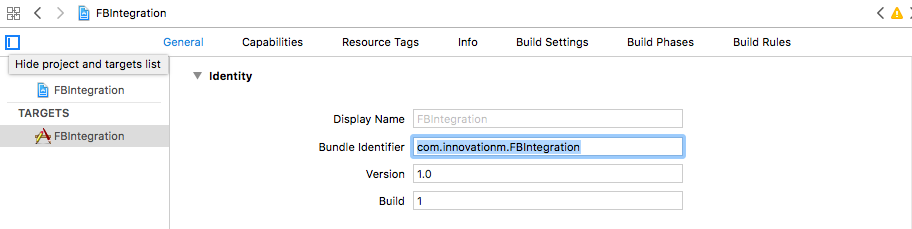
- Return on the Facebook dashboard, and paste or type the Bundle Identifier in the Bundle ID field
- Make sure to enable single sign-on and finally save changes.
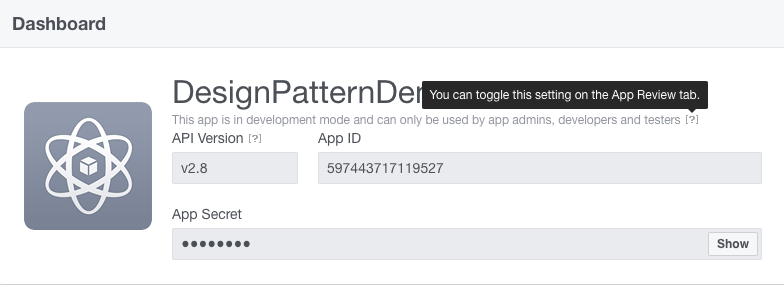
Note: App Id created here is later used to add into your project. - Return back to the dashboard from left navigation and check if the green circle besides your project name is unfilled. If it is so that means your app is in development mode yet and can only be used by app admins, developers and testers only. No other user can authenticate with Facebook from this app.
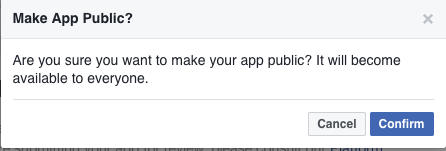
For making it publically accessible to all users, click on the question mark below the app name and toggle the button for making it public.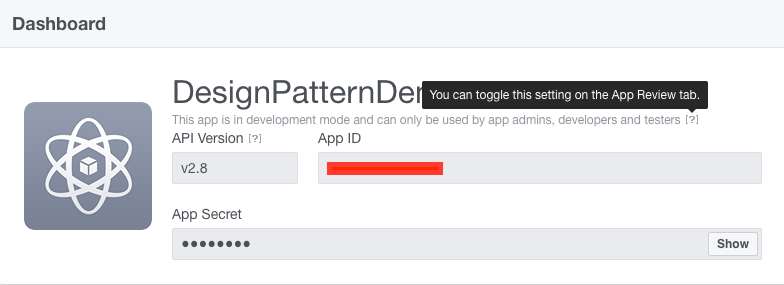
When you have enabled that button then it asks for the confirmation. So, Confirm it.
Note: If you’ll skip this step then you won’t be able to login with the account other than from which you have registered.
This is all you have to do on the Facebook dashboard for registering your app with it.
Add FBSDKLoginKit & FBSDKCoreKit Frameworks
Next main step is to add Frameworks for Facebook.
There are various versions available of Facebook SDK. Here, I would be using Facebook SDK version 4.17.0 for this. You can either download them and add to your project or you can add them via cocoa pods.
Here i am using cocoa pods for this. Make sure you have cocoa pods installed on your system.
Refer following steps to add framework:
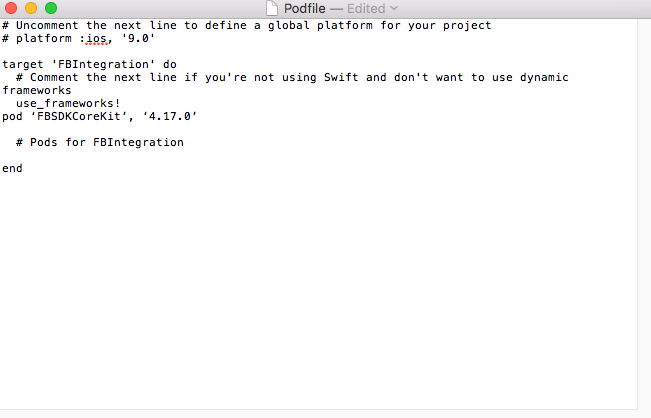
- Open your project’s root directory for the Pod file creation if it is not created yet. Now open Terminal and go upto your project root directory.

Run command pod init. It will create a pod file for you in the root directory. - Now open that Podfile and write pod ‘FBSDKCoreKit’, ‘4.17.0’ in the pod file you have just created above the line # Pods for FBIntegration.
- Go back to the terminal and Run command pod install there. It will install all dependencies for Facebook Sdk.
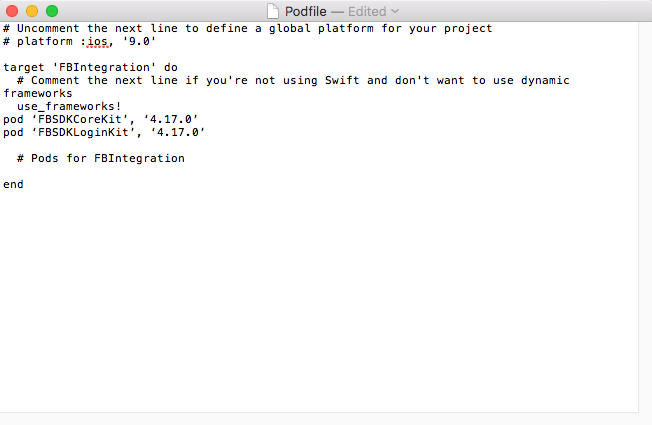
- Similarly add other pods for Facebook like this and install them like above.
- Now Close Terminal and open your xcode .workspace file in your project directory.
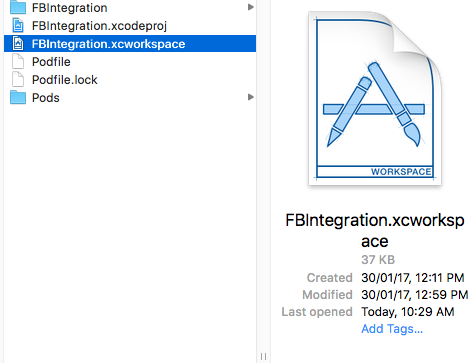
Note: If you open .xcodeproj file then you won’t get pod dependencies in your project. And, it will throw error that dependency files are not found.
Configure Xcode Project
There is one final step needed to be performed, and that is to add three new keys to the project’s .plist file. For this:
- In Xcode, right-click your project’s .plist file and select Open As -> Source Code.
- Insert the following XML snippet into the body of your file just before the final
</dict>element.<key>CFBundleURLTypes</key> <array> <dict> <key>CFBundleURLSchemes</key> <array> <string>fb{your-app-id}</string> </array> </dict> </array> <key>FacebookAppID</key> <string>{your-app-id}</string> <key>FacebookDisplayName</key> <string>{your-app-name}</string> <key>LSApplicationQueriesSchemes</key> <array> <string>fbapi</string> <string>fb-messenger-api</string> <string>fbauth2</string> <string>fbshareextension</string> </array> <key>NSPhotoLibraryUsageDescription</key> <string>{human-readable reason for photo access}</string> - Replace fb{your-app-id} with your Facebook app ID, prefixed with fb. For example, fb123456. You can find your App ID on the Facebook dashboard.
Replace {your-app-id} with your app ID.
Replace {your-app-name} with the display name you specified in the App Dashboard (DesignPatternDemo in this case)
Connect App Delegate
To configure Facebook with your application, write the following line of code in didFinishLaunchingWithOptions.
func application(_ application: UIApplication, didFinishLaunchingWithOptions launchOptions: [UIApplicationLaunchOptionsKey: Any]?) -> Bool {
        // Override point for customization after application launch.

        FBSDKApplicationDelegate.sharedInstance().application(application, didFinishLaunchingWithOptions: launchOptions)

        return true
    }
Now it will throw error as it wont found FBSDKApplicationDelegate. For this you need to import Facebook frameworks.
import FBSDKLoginKit
import FBSDKCoreKit
Add these on the top of AppDelegate.swift file.
Next, add method openURL, it is used to control flow once user successfully logged in through Facebook and returning back to application.
func application(_ app: UIApplication, open url: URL, options: [UIApplicationOpenURLOptionsKey: Any] = [:]) -> Bool {

        return FBSDKApplicationDelegate.sharedInstance().application(app, open: url as URL!, sourceApplication: options[UIApplicationOpenURLOptionsKey.sourceApplication] as! String!, annotation: nil)

    }
Design User Interface
Next, you will need to add the Facebook Login Button so that the user can initiate the sign-in process. You can add it in two ways: via Custom Button or FacebookSDK Button. Make the following changes to the view controller that manages your app’s sign-in screen.
Default Button
- It automatically displays the log in/log out Facebook button depending on the connection state. For this you need to add a button of type FBSDKLoginButton and configure it to read permissions. It’s always necessary to specify the read permissions you want for your app when logging in with Facebook.
Add the following code in your ViewController.swiftlet loginButton: FBSDKLoginButton = { let button = FBSDKLoginButton() button.readPermissions = ["email", "user_friends"] return button }()Set the button’s frame w.r.t view and add it on the super view. For example:
loginButton.center = (view.viewWithTag(0)?.center)! view.viewWithTag(0)?.addSubview(loginButton) - At this point you need to check if the SDK Token already exists. In other words you will check if you the user is logging in for the first time or the request has already been made.
if FBSDKAccessToken.current() != nil{
            fetchProfile()
        }
In this if the token is already present then we can directly made the graph request for fetching user Info.
Now what is this Graph Api request ? How this is made ? This will be explained later. - Now you need to set the delegate on this button so that when login will successful you’ll get call back on those delegate methods. Delegate can be set as:
loginButton.delegate = self //Your view controller object - Now inherits your ViewController.swift that conforms to FBSDKLoginButtonDelegate protocol as:
class ViewController: UIViewController, FBSDKLoginButtonDelegate{It will throw error as UIViewController does not conform to protocol. So we need to implement its delegate methods.
 func loginButtonWillLogin(_ loginButton: FBSDKLoginButton!) -> Bool {

        return true
    }
func loginButtonDidLogOut(_ loginButton: FBSDKLoginButton!) { print("logout") //When you call the logOut, the user is logged out of your app. it will not logout you from your fb account. if you want to do so, go into the safari app, you can go Facebook.com and logout of your account. let loginManager: FBSDKLoginManager = FBSDKLoginManager() loginManager.logOut() }func loginButton(_ loginButton: FBSDKLoginButton!, didCompleteWith result: FBSDKLoginManagerLoginResult!, error: Error!) { if error != nil { print(error) } else { fetchProfile() } }Custom Button
- For this you need to add a UIButton on you view controller in the Interface Builder and create its IBAction method.
Then we need to configure our button to read permissions as we have done for default button above. In order to fetch the total count of friends we have to read permission for it separately. For this add the following code in this method.if FBSDKAccessToken.current() != nil { fetchProfile() } else { let loginManager = FBSDKLoginManager() loginManager.logIn(withReadPermissions: ["email","public_profile","user_friends"], from: currentVC, handler: { (loginResults: FBSDKLoginManagerLoginResult?, error: Error?) -> Void in if !(loginResults?.isCancelled)! { self.fetchProfile() } else { // Sign in request cancelled let err = NSError() // handle error object } }) }It will first check for the access token. It will be nil when you have logged in for the first time and we need to read permissions otherwise we don’t need it.
Note: Make sure you have import the Facebook frameworks on the top of your class otherwise it will throw error.
Now you will somewhat confused about what the fetchProfile is ?
This method is used to make the graph request to fetch the profile information for the person currently logged into your app.
Configuring Facebook Graph Api
The SDK has a startWithCompletionHandler: method on FBSDKGraphRequest to implicitly create a FBSDKGraphRequestConnection for you. For this add the following code in your class:
func fetchProfile() {

        FBSDKGraphRequest(graphPath: "me", parameters: parameters).start{ (connection,result,error)-> Void in

            if error != nil {   // Error occured while logging in
                // handle error
                print(error)
                return
            }

            // Details received successfully
            let dictionary = result as! [String: AnyObject]
            // pass this dictionary object into your model class initialiser
        }
    }
Also you need to pass the parameters that you want to fetch. So add the following line of code above this method.
let parameters = ["fields": "email,picture.type(large),name,gender,age_range,cover,timezone,verified,updated_time,education,religion,friends"]
You can add several other parameters if they can be accessed or skip anyone from them. As i have added “friends” above to fetch the total no of friends in the list.
When you have successfully executed with the above code you are either carrying the user info or the error object that has occured.
Now Run your project and you’ll have Facebook button on your view. Click on it and it will get navigate on to safari and asks you to enter your details. On signing in you will get back to your app with your account information fetched in success block.
This is all about the Facebook Integration in Swift 3.0. 🙂