
Android Jetpack is the future of android development. In this blog, we will try to learn how we can make an app like the flutter default counter app.
Before creating the project make sure that every dependency related to the Android jetpack is added to your build.gradle file.
and your Android studio is updated to the arctic fox. Because in Android studio arctic fox they provided the support for Android Jetpack (version: 1) which is production-ready. So, make sure everything is clear before creating the project.
first we need to set the content in onCreate() method by method setContent { }
    eg : setContent {

                         StartComposeTheme {

                                     MyApp()

                         }

             }
Here MyApp() is our composable method in which we will do our layout things.
Let’s make our MyApp a composable method.
Note: We can make any method composable by giving annotation @Composable on top of the method.
@Composable
    fun MyApp(){

             Surface(color = MaterialTheme.colors.background){

                         CounterApp()

             }

    }
Here we will make another file named CounterApp.kt and in that file, we have to create a method named CounterApp() which is a composable method, and add all UI and logic-related things in that method.
@Composable
  fun CounterApp() {


             val counter = remember {

                         mutableStateOf(0)

             }


             Scaffold(

                         topBar = {

                                     TopAppBar(

                                                 title = { Text(text = "Compose Counter App") }

                                     )

                         },

                         floatingActionButton = {

                                     FloatingActionButton(onClick = { counter.value++ }) {

                                                 Icon(imageVector = Icons.Default.Add, contentDescription = "Add")

                                     }

                         },

                         content = {

                                     Column(horizontalAlignment = Alignment.CenterHorizontally, verticalArrangement = Arrangement.Center, modifier = Modifier.padding(16.dp).fillMaxSize()){

                                                 Text(text = "You have pushed the button this many times")

                                                 Text(text = "${counter.value}", style = MaterialTheme.typography.h4)

                                     }

                         }

             )

    }
Here, the remember{} method is used to remember the state (when the state changes), and mutableStateOf() is used to store or maintain the state when the state changes. The scaffold provides the entire structure in which we provide the content, appBar, floating action button, etc…
appBar is basically the toolbar in android.
The floating action button is basically the button that is rounded in shape and appears at the bottom of the screen.
In the content method, we have to pass the entire screen that we want to make. So, make sure that you write your entire UI inside the content method.
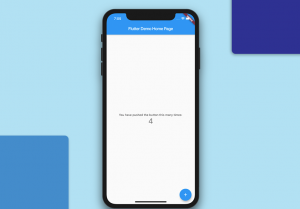
After successful completion of code run the code on emulator or device you will find the counter application.
Happy Coding 🙂