Introduction
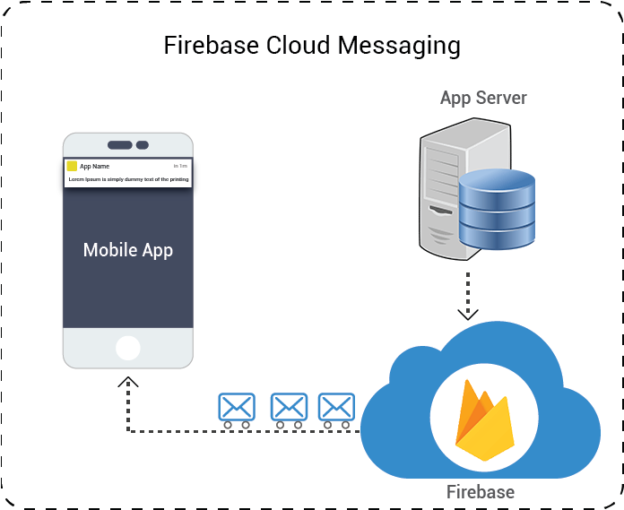
Firebase Cloud Messaging is a free mobile notification service by Google that enables third-
party app developers to send notifications from servers to their users. With Firebase Cloud Messaging Service, you can inform a client’s app that a new email or other data is available for sync. It works on the principle of down streaming messages from FCM servers to client’s app and upstream messages from client apps to FCM servers.
In this blog i will explain how to use this feature in our iOS App. This can be achieved via Notification messages.
Notification messages: Notification messages have a predefined set of user-visible keys and an optional data payload of custom key-value pairs. Your payload must be like this when you send notification either from Firebase console or from your server.
{
    "to" : YOUR_FCM_TOKEN,
    "notification" : {
      "body" : "Hello, there",
      "title" : "Test Notification",
“sound” : “default”
    }
"priority":"high"
//any custom key value pair
  }
YOUR_FCM_TOKEN : you will get this token from FCM when you register your app on FCM. But How? It is explained in later part of the post.
sound: It is set to default so that you will get the default sound when notification comes. If you’ll not set this key then there will be no sound.
priority: It must be set high in case of Notification messages.
Other type of Payload could be like containing both data and notification.
- When in the background, apps receive the notification payload in the notification tray, and only handle the data payload when the user taps on the notification.
- When in the foreground, your app receives a bundle with both payloads available.
For this JSON would be like:{ "to" : "Your_FCM_Token", "notification" : { "body" : "great match!", "title" : "Portugal vs. Denmark", "icon" : "myicon" }, "data" : { "Nick" : "Mario", "Room" : "PortugalVSDenmark" } }
Add Firebase to your app
- Create a Firebase project in the Firebase console. If you already have an existing project, click Import Google Project. Otherwise, click Add New Project. This will open a pop up window as:

- In this you need to enter your project name that you want to show on your Firebase console. Then click Create Project.
- After doing so you will shown with another window. Here you need to link your iOS app to Firebase So Click Add Firebase to your iOS App. This will open another pop up for
you asking your app details.
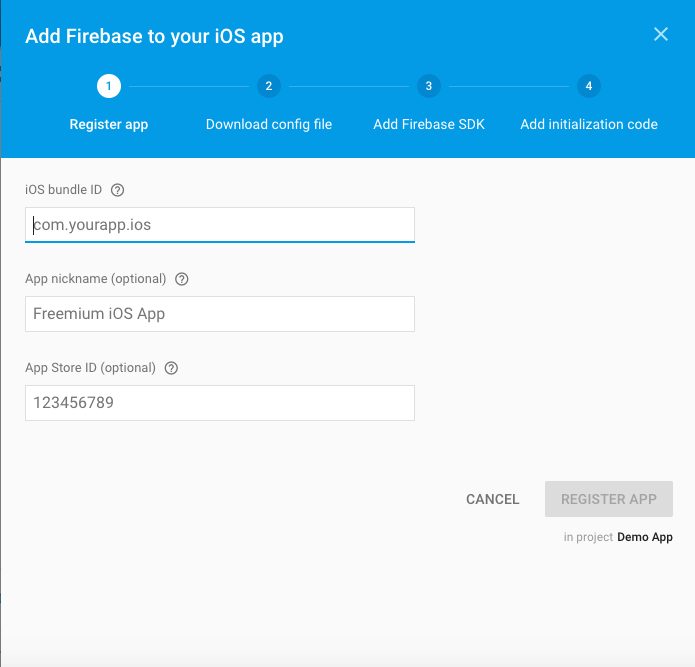 So Here enter your app’s Bundle ID. It’s important to enter the bundle ID your app is using; this can only be set when you add an app to your Firebase project.
 - Click Register App.
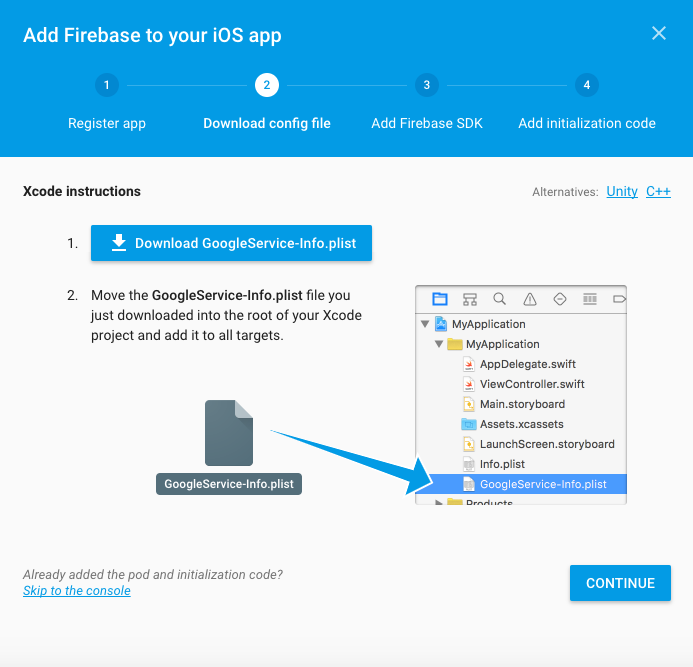
- Then you’ll download a GoogleService-Info.plist file. You can download this file again at any time.
- You have to put this file at the project’s root directory.
Add the SDK
Now you will add dependencies for the Firebase messaging.
Refer following steps to add framework:
- Open your project’s root directory for the Pod file creation if it is not created yet. Now open Terminal and go upto your project’s root directory.
Run command pod init. It will create a Podfile for you in the root directory if it is not present. - You can include a Pod in your Podfile like this:
pod ‘Firebase/Core’
pod ‘Firebase/Messaging’ - Go back to the terminal and Run command pod install there. It will install all dependencies for Firebase Messaging SDK.
- Now Close Terminal and open your xcode .workspace file in your project’s directory.
Note: If you open .xcodeproj file then you won’t get pod dependencies in your project. And, it will throw error that dependency files are not found. - Download a GoogleService-Info.plist file from Firebase console and include it in your app.
Upload your APNs certificates on Firebase
To enable sending Push Notifications through APNs, you need:
- An Apple Push Notification Certificate for your Apple Developer account.
- A provisioning profile for that App ID.
I am assuming that you already know how to create App Id on the Developer Console.
Now steps to upload APNs certificates, that you have created with the Push Notification entitlement enabled:
- Inside your project in the Firebase console, select the gear icon, select Project Settings, and then select the Cloud Messaging tab.
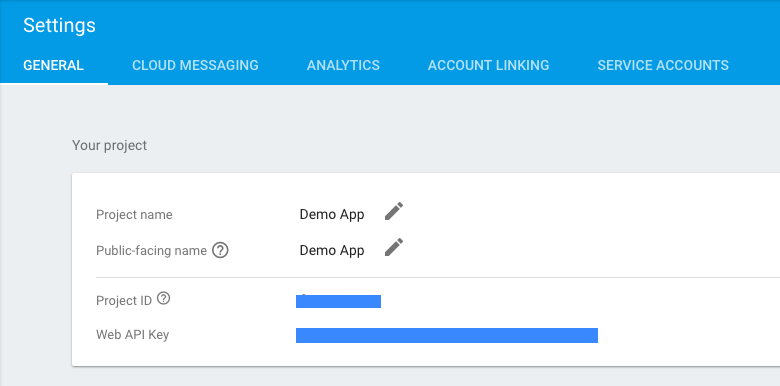
In the cloud Messaging tab, scroll to the bottom, you will found a page like this.
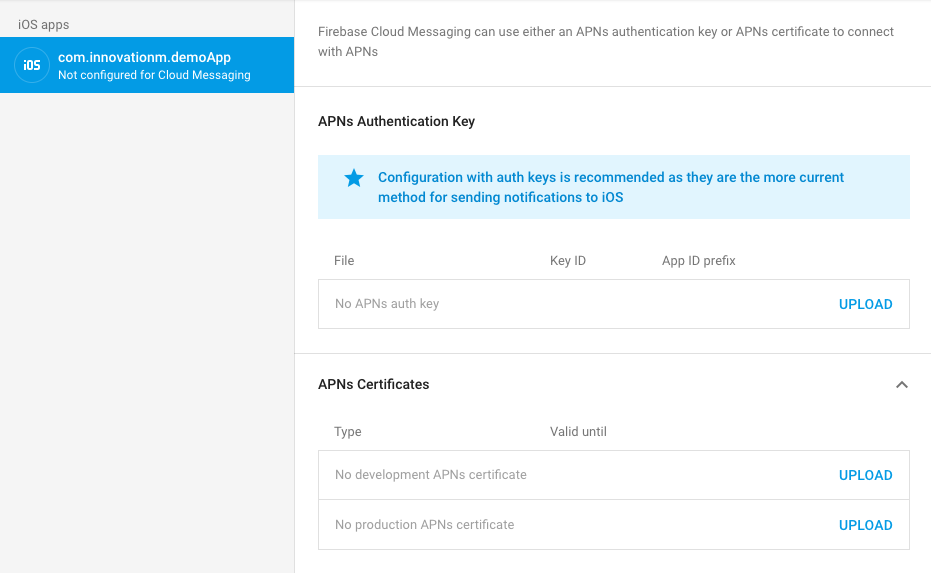
- Under APNs Certificates, upload your development and the production certificates.You can upload only development file for testing also. On click of Upload, it will open a pop-up as:
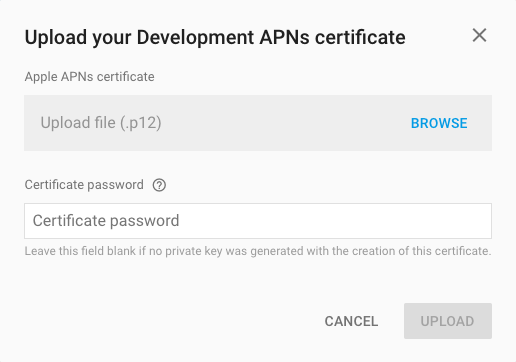
- Here add your .p12 file and click upload.
Now you are done with the Firebase console. Now all the changes would be done in code.
Initialise Firebase in your app
Before writing code you need to change settings in Xcode for cloud messaging. In General -> Capabilities enable Push Notifications.
Note: Please ensure that all the steps under this should be enabled. There should not be any red warning against any step, if so, then there is some problem with your App id in which Push Notification was added.
- Import the Firebase module in your AppDelegate.swift class:
import Firebase
- Configure Firebase shared instance, typically in your application’s application:didFinishLaunchingWithOptions: method:
FIRApp.configure()
Register for remote notifications
You need to register your app on the notification center. For this write the following lines of code:
if #available(iOS 10.0, *) {
            let center = UNUserNotificationCenter.current()
            center.delegate = self
            center.requestAuthorization(options: [.alert,.sound]) { (granted,error)in
                application.registerForRemoteNotifications()
            }
        } else {

            let notificationSettings = UIUserNotificationSettings(types: [.alert,.sound], categories: nil)
            application.registerUserNotificationSettings(notificationSettings)
            application.registerForRemoteNotifications()
        }
At this point you have registered for push notifications and so you will get the token from APNs in didRegisterForRemoteNotificationsWithDeviceToken: .
After you call the registerForRemoteNotifications() method of the UIApplication object, the app calls this method when device registration completes successfully. In your implementation of this method, connect with your push notification server and give the token to it. APNs pushes notifications only to the device represented by the token.
Now when you get the APNs token you have to set that token on the Firebase. Your code for this would be like:
func application(_ application: UIApplication, didRegisterForRemoteNotificationsWithDeviceToken deviceToken: Data) {

        // In debug mode
        FIRInstanceID.instanceID().setAPNSToken(deviceToken, type: FIRInstanceIDAPNSTokenType.sandbox)
        // In release mode
        FIRInstanceID.instanceID().setAPNSToken(deviceToken, type: FIRInstanceIDAPNSTokenType.prod)

    }
Now for the firebase token you first need to connect to the FCM. For this we make use of NSNotification. For this add the following line of code in didFinishLaunchingWithOptions:
In AppDelegate.Swift file.
NotificationCenter.default.addObserver(self, selector: #selector(AppDelegate.tokenRefreshNotification), name: NSNotification.Name.firInstanceIDTokenRefresh, object: nil)
Now whenever token gets refreshed we get the call in tokenRefreshNotification method. It will be like:
func tokenRefreshNotification() {
        // NOTE: It can be nil here
        let refreshedToken = FIRInstanceID.instanceID().token()
        print("InstanceID token: \(refreshedToken)")
        connectToFcm()
    }
func connectToFcm() {
        guard let refreshedToken = FIRInstanceID.instanceID().token() else {
            // Won't connect since there is no token
            return
        }
        // Disconnect previous FCM connection if it exists.
        FIRMessaging.messaging().disconnect()

        FIRMessaging.messaging().connect { (error) in
            if (error != nil) {
                print("Unable to connect with FCM. \(error)")
            } else {
                print("Connected to FCM.")
            }
        }
    }
Add the above code in your AppDelegate.swift.
When we get the token it will connect our app to the FCM. In the above method we can also register this token and the required parameters on our local App Server. Now our FCM set up is ready and we’ll get the notification.
Handle messages received through the FCM APNs interface
Received messages can be handled in two ways depending on the os version.
Implement AppDelegate application:didReceiveRemoteNotification: for below iOS 10 versions:
func application(_ application: UIApplication, didReceiveRemoteNotification userInfo: [AnyHashable : Any], fetchCompletionHandler completionHandler: @escaping (UIBackgroundFetchResult) -> Void) {

        if #available(iOS 10.0, *)  {

            return
        } else {
            if(application.applicationState == .active){

	//handle foreground state

            }
            else{
//handle background state on tap of notification
            }
        }
    }
For iOS 10 we can also handle the foreground state for the notification or we get banner in the foreground. For this you need to use UserNotifications Framework and implement UNUserNotificationCenterDelegate methods. Code for this would be:
@available(iOS 10.0, *)
    func userNotificationCenter(_ center: UNUserNotificationCenter, willPresent notification: UNNotification, withCompletionHandler completionHandler: @escaping (UNNotificationPresentationOptions) -> Void) {
        completionHandler([.alert, .sound])

    }

    @available(iOS 10.0, *)
    func userNotificationCenter(_ center: UNUserNotificationCenter, didReceive response: UNNotificationResponse, withCompletionHandler completionHandler: @escaping () -> Void) {

        let notif = response.notification.request.content.userInfo
        print(notif)
        //handle data
    }
Here you can handle the userInfo that we have received according to project’s requirement.
That’s all about FCM Implementation in Swift 3.0.