What is Font Awesome?
Font Awesome is a free vector icons-pack which you can use it in your app or web. Font Awesome has 675 free Icons with a variety of categories like web-applications set, accessibility set, transportation set, file-type icon set, form-control icon set and more. Font Awesome is outline and filled-outline set of Icons.
You just need to include TTF file in your project and you’re good to use Font Awesome Icons set. Same applies with your Android Project or iOS Project.
Why Font Awesome?
Imagine, you need an Icon for your app them, it’s quite obvious that you need the same icon with different pixels as you have to satisfy for different screen resolution.
Font Awesome come in rescue to solve this problem.
How Font Awesome Works?
Have you ever specified different font size for the different screen?
The answer is NO.
![]()
As Font adjust itself with the screen resolution. So, you don’t need to worry about these. Now, there is Font Awesome, who treats every icon as a character. It’s flexible enough to adjust itself to any screen.
Benefits
Till now, you’ve to ask your UI Designers for every icon while developing your App or Website. From now, you can use Font Awesome Icons instead. You can customize the fill color of icons as per your need.
Since Font Awesome belongs to single ttf file. As you don’t have to carry all your icons in a directory.
With the single file, It enhances the rendering performance.
Font Awesome Icons are the vector, therefore it looks smooth in retina display.
You can customize it with CSS effects like shadow color and text color.
Yes, It has Limitations
You can’t customize it with flat style or 3D effect in your icons. You’re limited to outline design. Most of the web designers don’t like single solid color icons.
Web Implementation
If you were developing your web application with Bootstrap framework then, it’s a good pair to attach with. Though, you’ve Glyph icons pack in Bootstrap itself, but, it’s not that huge as Font Awesome is.
Step 1.
Go to http://fontawesome.io and download Font Awesome 4 Icon Pack.
Step2.
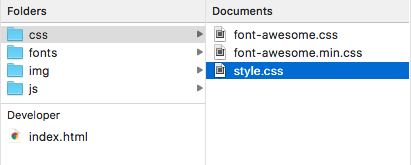
You’ll get these files,
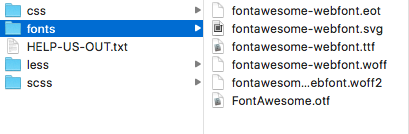
Step3.
Import css and fonts files respectively in your web project folder,
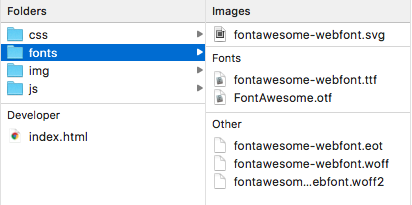
You won’t get style.css in your font awesome. Add manually, as we’re going to add custom style in style.css file.
Step 4.
Move to index.html file and add html boilerplate code
<!DOCTYPE html>

<html lang="en">

<head>

<meta charset="UTF-8">

<title>Font Awesome Demo</title>

</head>

<body>


</body>

</html>
|
Step 5.
Next, you’ve have to import font awesome css file in your index.html file. Since, Font Awesome is external stylesheet file. So, you have to add it using <link/> tag.
Add it in between <head/> tag.
<head>

<meta charset="UTF-8">

<title>Font Awesome Demo</title>

<!-- Font Awesome -->

<link rel="stylesheet" href="css/font-awesome.min.css">

<!-- Custom Style -->

<link rel="stylesheet" href="css/style.css">

</head>
Step 6.Do the same for style.css which is going to be the custom stylesheet for our demo project where we define our own styling. We’ll use this in our future demonstration.
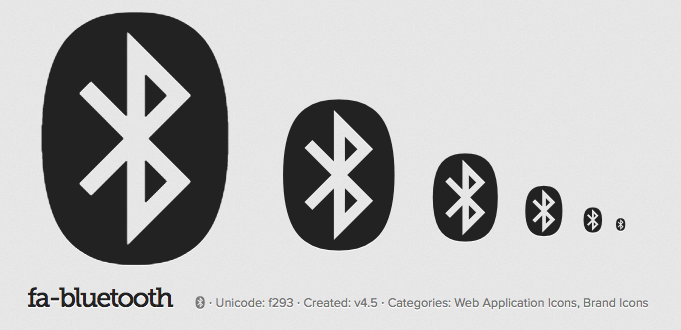
Next, we’ll go to fontawesome.io website > Icons (http://fontawesome.io/icons/)
Choose any of the Icon which you want to show.
Say, I clicked on Bluetooth icon.

If you want to add, Bluetooth Icon just put this line in <body> where you want to add
<i class="fa fa-bluetooth" aria-hidden="true"></i>
So, mine look like instead of <i> tag, i prefer <span> tag as per Bootstrap guidelines.
<span class="fa fa-bluetooth"></span>
fa-lg Above icon is default size. If you want to manipulate the size then Font Awesome has some predefined size-class.
- fa-2x
- fa-3x
- fa-4x
- fa-5x
So my code, look like
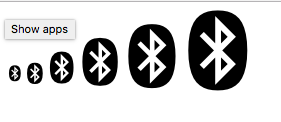
<!-- Font Awesome Sizes -->

<span class="fa fa-bluetooth"></span>

<span class="fa fa-bluetooth fa-lg"></span>

<span class="fa fa-bluetooth fa-2x"></span>

<span class="fa fa-bluetooth fa-3x"></span>

<span class="fa fa-bluetooth fa-4x"></span>

<span class="fa fa-bluetooth fa-5x"></span>
And, after rendering it looks like
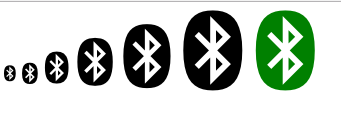
Till now it’s in solid black color. What if, I want my Icons in green color.
Then, You have to style your icon.
Open style.css file and add a custom class
| .fontInGreen{
color: green; } |
And, apply it with span tag.
<!-- Font Awesome Styling -->

<span class="fa fa-bluetooth fa-5x fontInGreen"></span>
|
iOS Implementation
You can also use Font Awesome in your iOS Project. You just need Font Awesome ttf file in your Project. And, you are almost done.
So, follow below steps:-
Step 1.
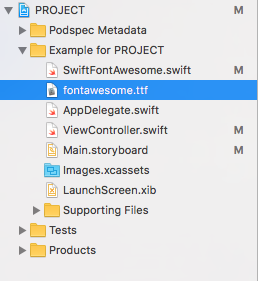
Drap-and-Drop font awesome-webfont.ttf file in your project.
Step 2.
Mention FontAwesome file in your Info.plist file against UIAppFonts key. Since you’re going to use external font file so, you’ve to mention in your app’s Info.plist file.

Step 3.
Add SwiftFontAwesome.swift reusable class in your project.
Just Drag and Drop SwiftFontAwesome.swift
Step 4.
Say, you want to place an Icon in your View. Then, you assume it would be UIImageView. But, in case of font awesome, you have to use UIlabel instead of UIImageView as Font Awesome Icons are the character in itself.
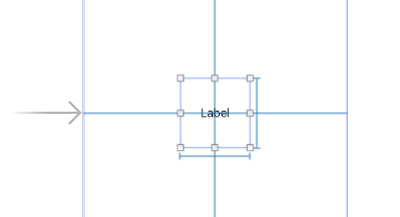
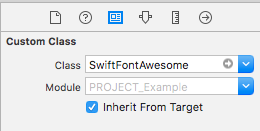
And, assign SwiftFontAwesome in Label Class.
Step5.
Make an outlet of the label and assign icon.
There is single Method icon method with minimum two parameters i.e. Icon Name and Icon Size
myLabel.icon(type: .ambulance, withSize: .tripleExtraLarge)
myLabel is my outlet name. Here, .ambulance is Icon Type. It belongs to FontAwesomeIcon type which is an enum. This enum has all the Unicode characters.
.tripleExtraLarge is Icon Size.
And, I’ll get something like this

| Explore SwiftFontAwesome.swift,
There are 8 Font Sizes –
|
Android Implementation
Step 1.
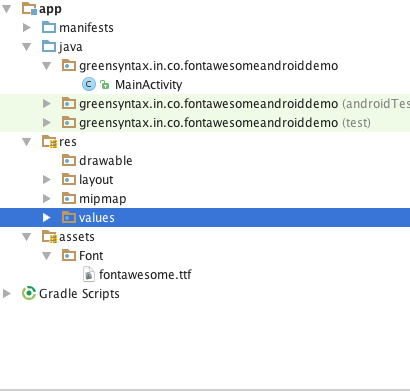
Add FontAwesome.tff file in your Assets directory of your Project.
Step 2.
Create a sub-directory named “Font” in Assets directory.
Step 3.
Alike iOS, you have to use TextView instead of Image View. So, choose your TextView where you want to put the Font Awesome Icon.
Though, I making my TextView
<TextView

android:id="@+id/myTextView"

android:layout_width="wrap_content"

android:layout_height="wrap_content"

android:text="Hello Font Awesome"

android:textSize="@dimen/fontLarge"

android:gravity="center"

android:layout_centerHorizontal="true"

android:layout_centerVertical="true"/>
|
In dimens.xml I’ve defined three keys for Font Size. Here, I’m using fontLarge.
<!-- Font Awesome -->

<dimen name="fontSmall">20sp</dimen>

<dimen name="fontMedium">30sp</dimen>

<dimen name="fontLarge">50sp</dimen>
Next, we‘ll attach the FontAwesome with the Text View, Step 4.
// Get Text View

TextView myFontText = (TextView)findViewById(R.id.myTextView);

// Extract Font Awesome

Typeface fontAwesome = Typeface.createFromAsset(getAssets(), "Font/fontawesome.ttf");

// Assign it to TextView

myFontText.setTypeface(fontAwesome);

myFontText.setText("\uf293");
 \uf293 is the Unicode character of Bluetooth Icon which you’ll get from FontAwesome website.
And, when we run the project it will look like,

Conclusion
Icons and Correct icons are one of the key feature for your website or App. It’s up to you or your UI Team are they willing to use Font Awesome Icon or their own icon. Lastly, don’t forget to thank Dave Gandy whose fonts are awesome.