Introduction:
Source code management is simply referred to as version control or revision control which is a management of changes of documents or any other collection of information. Source code management is necessary if we are working in a group and we need to synchronise our code if any one of them perform changes.
Problem:
Source code management cannot be achieved if we are performing it manually. What I mean is seriously? What if two developers working on same file, same class and same line and merging the code is necessary? Code functionality can interrupt. There may be in-numerous duplicity in code. Also what in case if your system crashes and all your source code lost?
Solution:
The ideal solution for the above stated problem is performing Source code Management by saving our code at a different location may be on some server. One such platform is SvnX. It is worldwide accepted and one of the most easy tool for Source code Management. It manages different versions of code and is very interactive.
Installation:
SvnX is a free and open source SVN client for the Mac. It has a rather simple user interface and supports most features required for SVN work. Let’s install it to get a better idea of what it can do. Head over to the SvnX site and download the latest release. After your download completes it should extract automatically. Drag and drop the SvnX application into your system’s Applications folder. That’s it, the installation of SvnX is complete.
How to use?
- Open SvnX from your applications folder.
- Previously there were two seperate windows both for Working Copies and Repositories but in version 2.0b2, there is only one single window consists of both the working copies and repositories looks like image below:
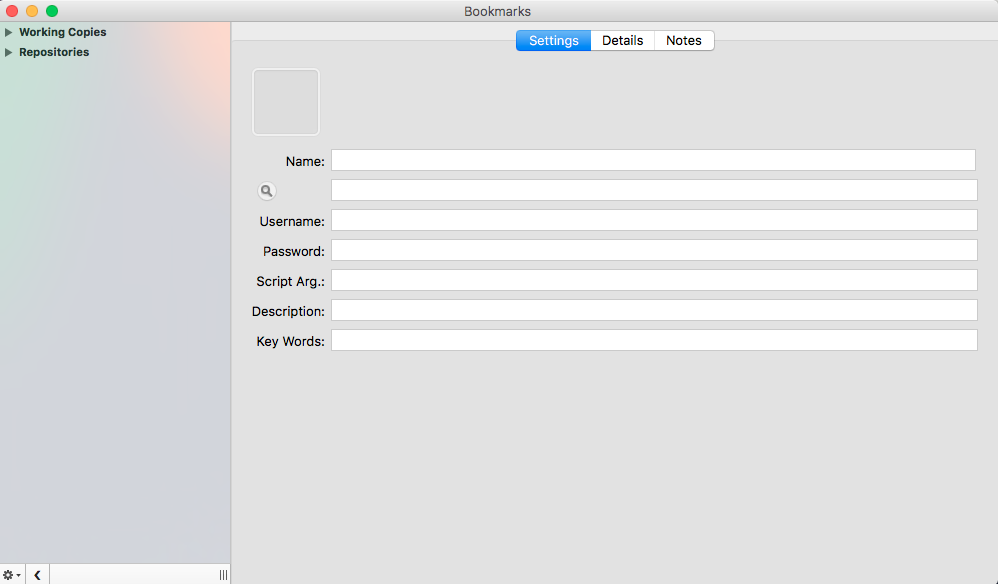
- Repositories shows all your project related files and folders residing on the SvnX server. Working copies connects your project directly with the project residing on the server. Any changes in the working copy can be visible in the working copy console. Whenever you take a checkout of project from SvnX server, a working copy is created every time for a new path.
Connect to Repository:
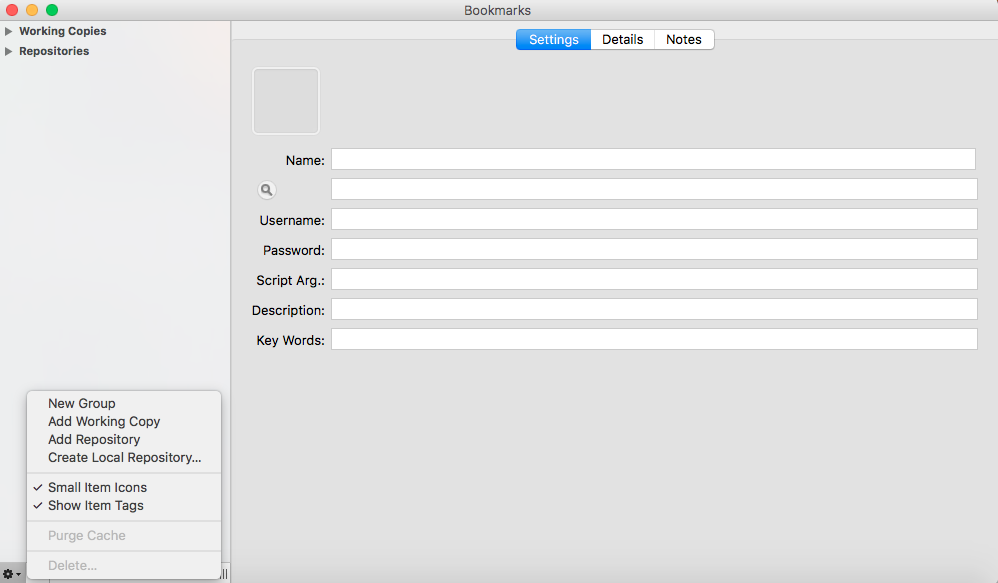
- To connect with a repository on SvnX, we need a path where the project is located, a user name and a password. Click on a gear icon at the bottom left and select Add Repository.
- Now select the newly added repository and enter the name of your project(can be different from that of saved in repository), path of the project where project is located, username to access that path and a password. Leave the other fields as they are optional.
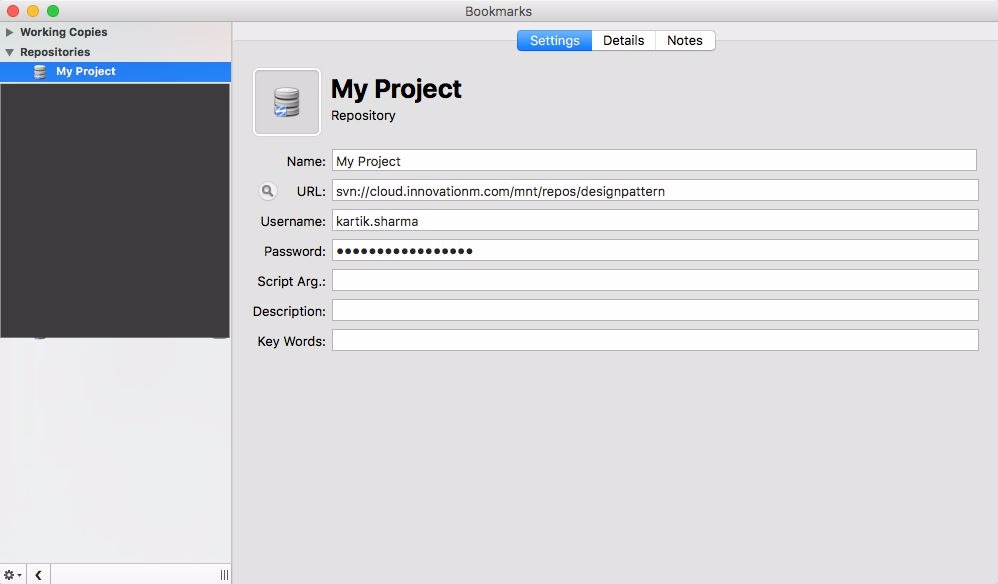
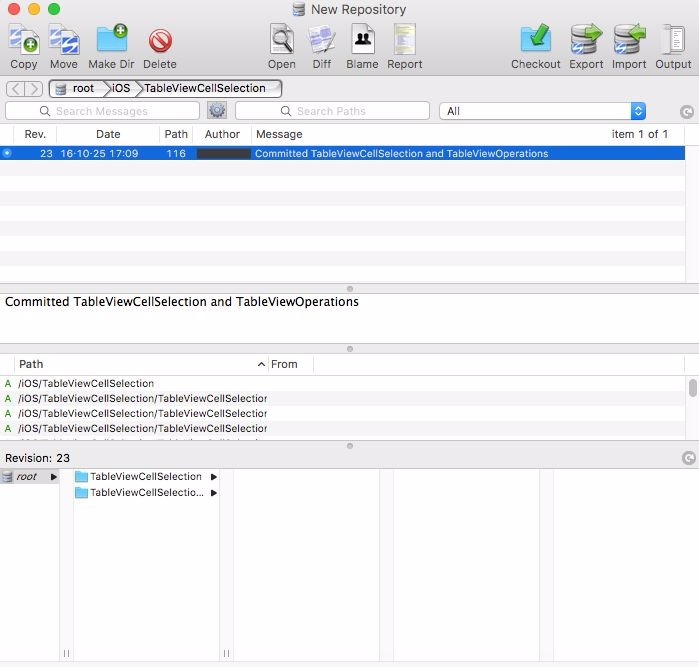
- Now double click on new created repository, you’ll see all the write updates in repository console:
Create a working copy:
To create a working copy, you need to take a checkout of your saved project locally. For checkout:
- Select the revision from console.
- Select the folder or file from the bottom area.
- Then click on checkout button on top.
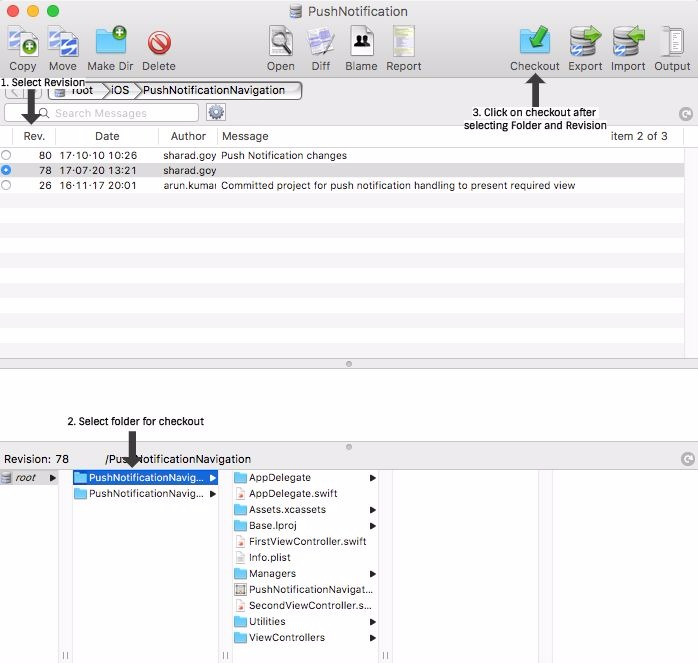
- If you don’t select the folder, every file stored at that path will be downloaded. You can take a checkout of your project or related file at any revision. A revision is incremented every time a new update is committed to server. If you don’t have a project saved on your system, you have to take a checkout of the root folder of your project by selecting from the bottom hierarchy and its subfiles or subfolder will be automatically downloaded.
- A finder window will open which requires you to select a path where your selected revision of selected folder or file will be downloaded. Create a new folder or select the already created folder anywhere in your system and click on checkout.
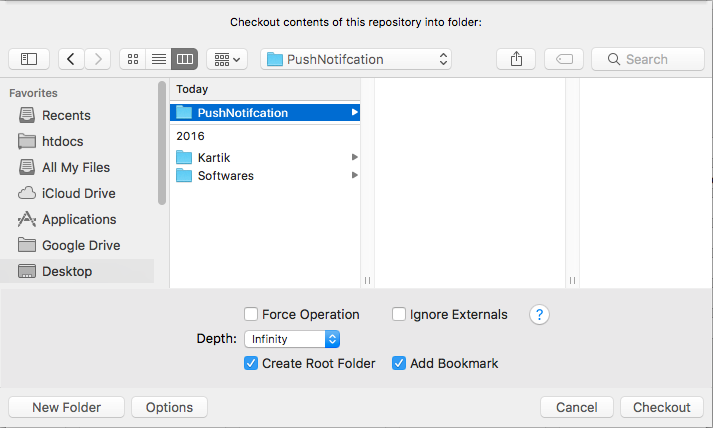 A new working copy will be created.
 - Tap on the newly created working copy under working copies section in SvnX. Your working copy console will open:
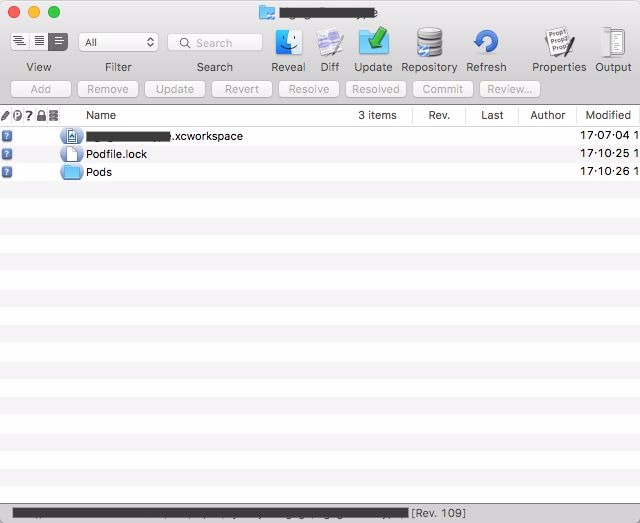
You can perform various operations within working copy to synchronise your code with the repository. Such operation include:
- Refresh working copy(in case if any file content is changed and is not reflected in working copy) by clicking on refresh button.
- Update working copy to the latest revision(if you have an old version and someone has committed a new code increasing the revision) by clicking on update button with icon.
- revert your entire code of file with one click by selecting the file shown in working copy and then click on revert to change the content of file to the lat revision saved on SvnX server.
- You can check the difference between your code and code saved on repository by selecting file in working copy console and clicking on Diff button.
- Commit your change in any file if any like newly added files, deleted files, modified files. To commit any file, select the file in working copy console, and click on commit button.

Now don’t keep your source code in your system and start using SvnX, a powerful tool.
 End to End Technology Solutions
