Welcome to the world of Location. We have been talking about Location as an important attribute in mobile apps today. Business people and Developers are talking about it. Have you ever thought as to how a testing of apps based on location can be done? Let us talk about it.
This articles flows like this:
- What is Location?
- Concept of Location Provider
- Case Study
- Tools for testing Location based applications
1. What is Location?
Location is place or point that something is at on this earth. Each point on this earth is identified by two data points – Latitude and Longitude. There are more attributes to Location but these two are the core.
2. Concept of Location Provider
A location provider provides current location of the device to the applications running in the device.
Each provider has a set of criteria under which it may be used; for example, some providers require GPS hardware and visibility to a number of satellites; others require the use of the cellular radio, or access to a specific carrier’s network, or to the internet. They may also have different battery consumption characteristics or monetary costs to the user
Types of Location Provider – There are three Location Providers – GPS Provider, Network Provider and Passive.
- GPS – This provider determines location using satellites. Depending on conditions, this provider may take a while to return a location fix.
- Network – This provider determines location based on availability of cell tower and WiFi access points. Results are retrieved by means of a network lookup.
- Passive – A special location provider for receiving locations without actually initiating a location fix.This provider will return locations generated by other providers.
Comparison of Providers:
|
Provider – GPS |
Provider – Network |
Provider – Passive |
|
Autonomous GPS |
Assisted GPS / Wifi |
CellID lookup/Wifi |
|
Use GPS chip on device |
Use GPS chip on device as well as assistance from network (cellular network) to provide fast initial fix |
Doesnot require any GPS chip on device to be active |
|
Line of site to the satellite |
Work without any line of site to sky |
Work without any line of site to sky |
|
Sometime take long time to get a fix |
Provide fast lock and accurate |
Provide fast lock |
|
Power Usage – high |
Power Usage – Medium/Low |
Power Usage – Low |
|
Accuracy – 20ft |
Accuracy – 200ft |
Accuracy – 5300ft/1 mile |
3. Case Study
Situation – Let us study with an example on how to track delivery of goods. Suppose a truck having goods moving along a road has to deliver goods to retail shops in the city. Truck driver is carrying a mobile device and an application. A Route is provided that carries address and location of retailers on that route and this data is provided to the application. Application gets the current location from Location Provider and compares the proximity of location of retailers with current location. If distance between current location and retailer location is within range then that retailer is marked as visited.
Test Case – User goes on the route with this application and application marks the retailers addresses on the route correctly.
How to Test?
There are two ways to do it:
1. Physically go on that route and test.
2. Emulate that user is moving on that route while physically elsewhere.
You can do a very limited testing while following approach #1 above. So, I will be talking about how to emulate different scenarios while sitting on your desk. Here it goes…
Before we take a deep dive, let us understand concept of Location file formats – KML and GPX.
GPX (the GPS Exchange Format) is a light-weight XML data format for the interchange of GPS data (waypoints, routes, and tracks) between applications and Web services on the Internet.
GPX File Format:
<?xml version="1.0" encoding="UTF-8"?>
 <gpx
 version="1.1"
 creator="Created by Google My Tracks on Android."
 xmlns="http://www.topografix.com/GPX/1/1"
 xmlns:topografix="http://www.topografix.com/GPX/Private/TopoGrafix/0/1"
 xmlns:xsi="http://www.w3.org/2001/XMLSchema-instance"
 xsi:schemaLocation="http://www.topografix.com/GPX/1/1 http://www.topografix.com/GPX/1/1/gpx.xsd http://www.topografix.com/GPX/Private/TopoGrafix/0/1 http://www.topografix.com/GPX/Private/TopoGrafix/0/1/topografix.xsd">
 <metadata>
 <name><![CDATA[Truck Route]]></name>
 <desc><![CDATA[]]></desc>
 </metadata>
 <trk>
 <name><![CDATA[Truck Route]]></name>
 <desc><![CDATA[]]></desc>
 <type><![CDATA[]]></type>
 <extensions><topografix:color>c0c0c0</topografix:color></extensions>
 <trkseg>
 <trkpt lat="28.581475" lon="77.314435">
 <ele>137.5</ele>
 <time>2013-04-03T14:37:10.000Z</time>
 </trkpt>
 <trkpt lat="28.581517" lon="77.314399">
 <ele>137.5</ele>
 <time>2013-04-03T14:37:11.000Z</time>
 </trkpt>
 </trkseg>
 </trk>
 </gpx>
KML is a file format used to display geographic data in an Earth browser such as Google Earth, Google Maps, and Google Maps for mobile. KML uses a tag-based structure with nested elements and attributes and is based on the XML standard
KML File Format:
<?xml version="1.0" encoding="ASCII"?>
 <kml xmlns="http://earth.google.com/kml/2.2">
 <Document>
 <name>GE2ADT</name>
 <Placemark><name>21</name><description>GE2ADT Route</description><Point><coordinates>-74.61453,40.47307,0</coordinates></Point></Placemark>
 <Placemark><name>22</name><description>GE2ADT Route</description><Point><coordinates>-74.614564,40.472985,0</coordinates></Point></Placemark>
 <Placemark><name>23</name><description>GE2ADT Route</description><Point><coordinates>-74.614661,40.472743,0</coordinates></Point></Placemark>
 <Placemark><name>24</name><description>GE2ADT Route</description><Point><coordinates>-74.614784,40.472387,0</coordinates></Point></Placemark>
 <Placemark><name>25</name><description>GE2ADT Route</description><Point><coordinates>-74.615058,40.471677,0</coordinates></Point></Placemark>
 <Placemark><name>26</name><description>GE2ADT Route</description><Point><coordinates>-74.615168,40.471369,0</coordinates></Point></Placemark>
 <Placemark><name>27</name><description>GE2ADT Route</description><Point><coordinates>-74.615289,40.471028,0</coordinates></Point></Placemark>
 </Document>
 </kml>
How to generate these files?
There are few tools available to generate GPX / KML files. See the Section (Tools) for more details.
Testing Steps (In Android)
1. Generate the file – First of all generate KML / GPX file of a route as described above.
2. Run generated file in Emulator – KML / GPX File will be played inside Emulator Control of DDMS perspective of Eclipse (with ADT Plugin). Following are the Steps on how to play KML or GPX file in Emulator.
Step 1 –> Open Eclipse
Step 2 –> Create an application that will listen to Location Updates from Location Provider. Open / Create a Project:
Step 3 –> Create AVD / Emulator.
Step 4 –> Run Your Application in Android Emulator
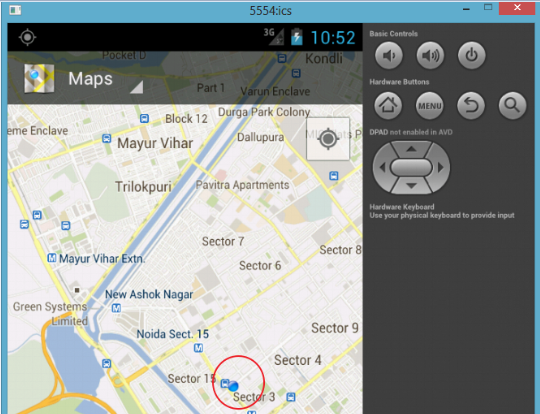
Step 5 –> Open Google Map In Emulator
Step 6 –> In DDMS, select Emulator Control
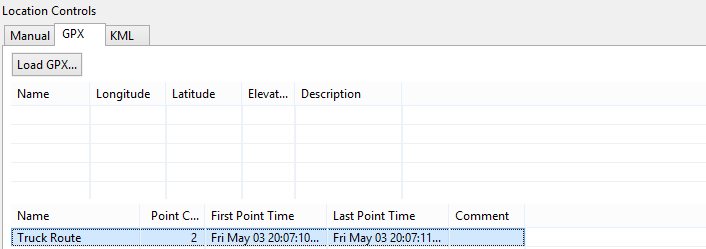
Step 7–> For Loading GPX File, select your applcation and then click on “Load GPX…”
Step 8 –> After loading GPX File in Location Control, you will see your GPX File name
Step 9 –> To Play GPX File, Select GPX file and click Play button at the bottom.
You will see a point move on the Map.
Similarly you can load KML files.
Notes:- DDMS support only GPX 1.1 Files
3. Check the data in the application if the route is marked correctly
See the results of the Test in your application.
Testing Steps (On iOS):
1. Generate the file – There is different GPX file format that is to be played on iOS simulator. For details please follow ‘RunKeeper’ tool below and generate GPX file of route.
2. Run that generated in Simulator – Open up your xCode project, you can select Product -> Debug -> Simulate Location->Add GPX file from the menu bar to add GPX file to your project
It will ask you to choose/add your GPX file.
After adding GPX file, you can select Location icon in xCode and click your GPX file name .
You will see a point move on the Map
4. Tools for testing Location based application
1. My Tracks
It is an Android application useful for creating KML, GPX file. My Tracks records your path, speed, distance, and elevation while you walk, run, bike, or do anything else outdoors. You can download My Tracks from Google Play.
URL – https://play.google.com/store/apps/details?id=com.google.android.maps.mytracks)
Usage – Somebody can physically record the path by actually moving on that Good Delivery Route and generate the File for Testing team.
2. KML Generator
It is website that generate KML file using GPS coordinate. We just have to put latitude and longitude under GPS coordinate column and output as KML (download). You can go to this website through this url – http://kmltools.nobletech.com/
Usage – If you know the Coordinates (Latitude and Longitude) of the points on the Path then you can generate KML file.
3. Google Earth to ADT plugin
This application helps in converting KML file to another format of KML that Android development tools (Suitable for Eclipse Android ADT plugin) can understand. Here a link to the url – (http://ge2adt.appspot.com/)
This application help in generating kml file for make path or placemark in google earth or convert Google Earth routes to a format suitable for Eclipse Android ADT plugin 0.8.0
4. Google Earth
You can visually see the path / route on Google Earth.
Ex. You can have a Delivery Route KML file & the Actual KML file that was played and see the points on Google Earth.
5. RunKeeper
This application generate GPX file that is to be played on iOS simulator. Follow below steps to generate GPX file.
Usage – Somebody can physically record the path by actually moving on that Good Delivery Route and generate the File for Testing team.
1. Download ‘RunKeeper’ app from the app store, and run it.
2. After sign up for the app, you can start capturing GPS log. Press ‘Start Activity’ and walk around under an open sky.
3. After you logged GPS data enough, press ‘STOP’ button, and then ‘Yes I’m done’
4. Hit ‘Save’ to transfer GPS data to RunKeeper website.
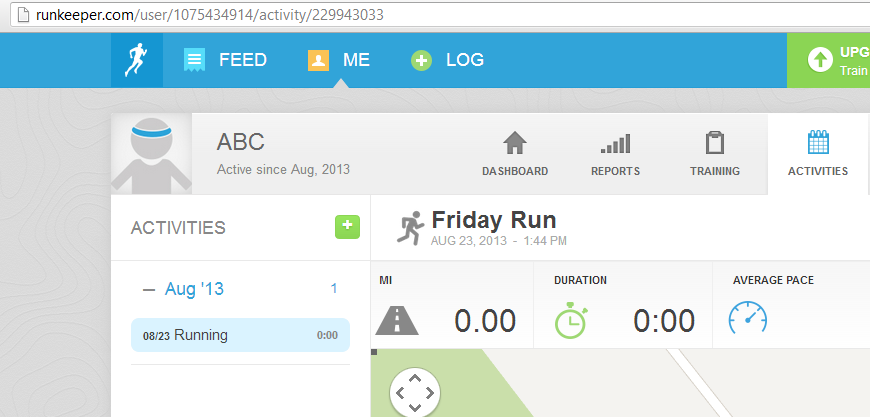
5. Log in to RunKeeper website with the account that you signed up from step 2 Then click on ‘Activities’
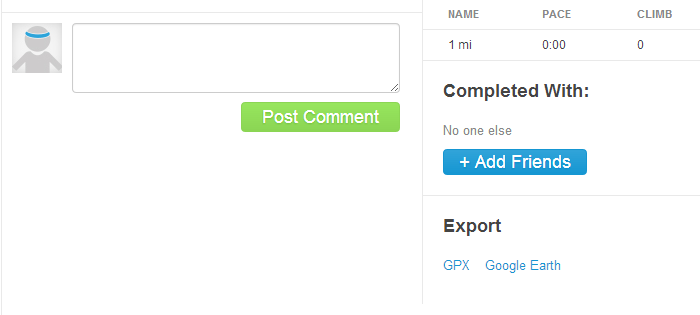
6. Scroll down, and then you can find ‘Export GPX’ option. Click on it, so you can download GPX file from the website
After downloading GPX file, the GPX file format looks like this.
<?xml version="1.0" encoding="UTF-8"?>
 <gpx
 version="1.1"
 creator="RunKeeper - http://www.runkeeper.com"
 xmlns:xsi="http://www.w3.org/2001/XMLSchema-instance"
 xmlns="http://www.topografix.com/GPX/1/1"
 xsi:schemaLocation="http://www.topografix.com/GPX/1/1 http://www.topografix.com/GPX/1/1/gpx.xsd"
 xmlns:gpxtpx="http://www.garmin.com/xmlschemas/TrackPointExtension/v1">
 <trk>
 <name><![CDATA[Running 8/23/13 1:44 pm]]></name>
 <time>2013-08-23T13:44:05Z</time>
 <trkseg>
 <trkpt lat="28.581355000" lon="77.319664000"><ele>207.0</ele><time>2013-08-23T13:44:05Z</time></trkpt>
 <trkpt lat="28.581355000" lon="77.319664000"><ele>207.0</ele><time>2013-08-23T13:44:06Z</time></trkpt>
 </trkseg>
 </trk>
 </gpx>
This GPX format can’t be played on iOS simulator. We have to do some modification so that it can be play on iOS simulator. Remove all of <trk> and <trkseg> from the files (Find and delete it). Press ALT+Command+F, and replace tag ‘trkpt’ into ‘wpt’.
GPX File Format – playable in iOS simulator:
<?xml version="1.0" encoding="UTF-8"?>
<gpx
version="1.1"
creator="RunKeeper - http://www.runkeeper.com"
xmlns:xsi="http://www.w3.org/2001/XMLSchema-instance"
xmlns="http://www.topografix.com/GPX/1/1"
xsi:schemaLocation="http://www.topografix.com/GPX/1/1 http://www.topografix.com/GPX/1/1/gpx.xsd"
xmlns:gpxtpx="http://www.garmin.com/xmlschemas/TrackPointExtension/v1">
<name><![CDATA[Running 8/23/13 1:44 pm]]></name>
<time>2013-08-23T13:44:05Z</time>
<wpt lat="28.581355000" lon="77.319664000"><ele>207.0</ele><time>2013-08-23T13:44:05Z</time></wpt>
<wpt lat="28.581355000" lon="77.319664000"><ele>207.0</ele><time>2013-08-23T13:44:06Z</time></wpt>
</gpx>
Application URL:
https://itunes.apple.com/us/app/runkeeper-gps-track-running/id300235330?mt=8
Website URL:
https://runkeeper.com/login
I hope this was helpful and I didn’t overload you …. 🙂
 End to End Technology Solutions


