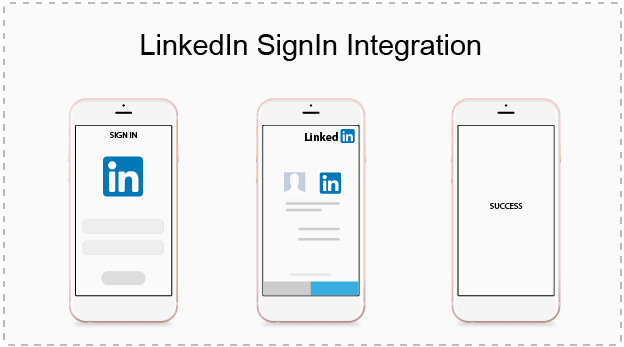
Social media is everywhere and integrating any social media platform upgrades your application in every way. LinkedIn is one such platform widely used & client-demanding both at the same time.
Integrating Sign in from LinkedIn into your app is not a difficult process. Just follow the simple steps so that you can have an easy access to your linkedIn account.
Your xcode projects needs to be added to the linkedIn account in order to use LinkedIn sdk in your xcode project.
Add app to your LinkedIn account:
- Open your browser and search for link https://developer.linkedin.com/
- Now click on My Apps from the tab.
- Sign in with your LinkedIn existing account or create a new LinkedIn account.
- Under My Apps section, you’ll find all those apps which are linked to your account. You can review settings for your existing apps or you can Create a new application just on a click of Create Application button.

- Here you’ll find a form where you have to fill all the details related to your app including App name, App logo etc.
- After filling all the mandatory details, click on submit button.
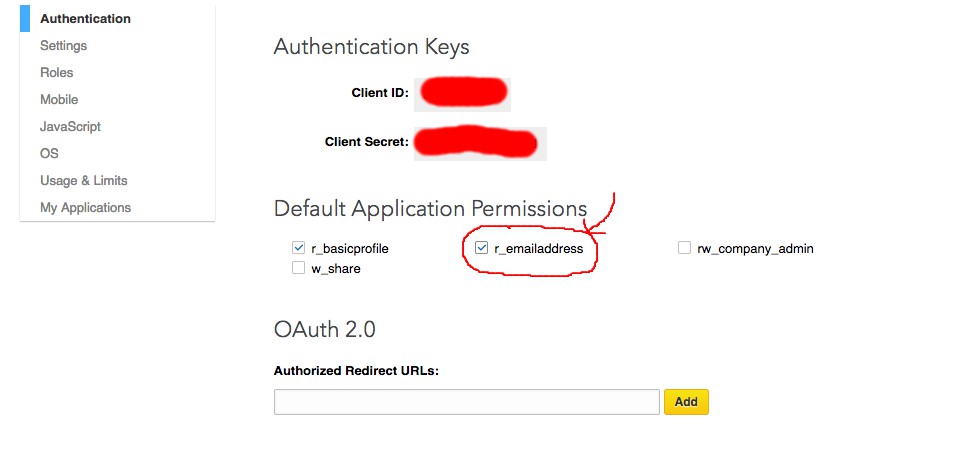
- Now under the Authentication section of your newly created App, you’ll find your app’s client ID and client Secret keys which you need to add to your xcode project which we’ll discuss later.

- If you wan’t to fetch email address from the user’s account, make sure you have checked the r_emailaddress option. If it is unchecked, your app will not be able to get the user’s email address.
- Also add a valid Authorized URL for redirection under the following fields:

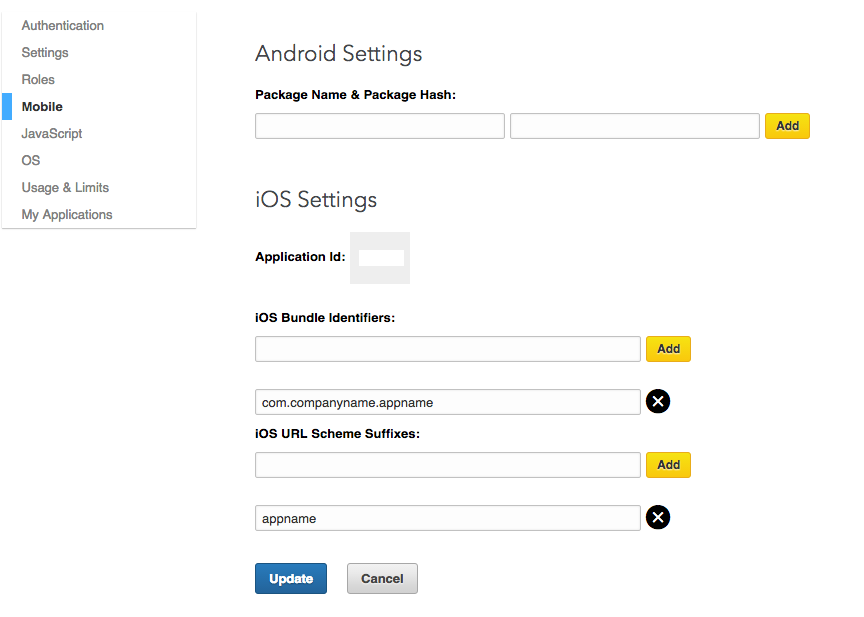
- Now goto Mobile section and in iOS Settings add your Bundle identifier and a url suffix and also note down the Application Id given at this page.

Finally click on Update button to update all the settings. This completes the process of adding your app to your LinkedIn account.
Creating a new xcode project
- Create your xcode project.
- Create a podfile of your project inside your project’s directory using terminal commands:
- Open a terminal window, and $ cd into your project directory.
- Create a Podfile. This can be done by running $ pod init command.
- Open your Podfile from finder.
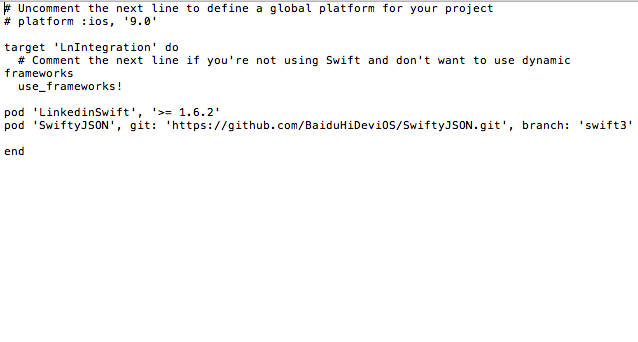
- Add ‘LinkedinSwift’ and SwiftyJSON pods just like you are seeing in an image below:

- Save the podfile
- Now install the podfile:
- Open a terminal window, and $ cd into your project directory.
- Install a Podfile. This can be done by running $ pod install command.
- Close your project and go to your project directory folder where you’ll find your project file with .xcworkspace extension. Open <your project>.xcworkspace file.
- Now create a bridging-header file and add the following code before #endif.
#import <LinkedinSwift/LSHeader.h>
- Find your view controller file and at the top add statement import LinkedInSwift.
- If no errors occurs, you have successfully installed all the required pods. Else your linkedInSwift pod might be missing in your project directory or might be misplaced from the required location.
- Now open your info.plist file as a source code to add LinkedIn Application ID. For this copy the code below and add to your info.plist file at any place.
<key>LIAppId</key> <string><your App ID></string> <key>CFBundleURLTypes</key> <array> <dict> <key>CFBundleURLSchemes</key> <array> <string>li<your App ID></string> </array> </dict> </array> <key>LSApplicationQueriesSchemes</key> <array> <string>linkedin</string> <string>linkedin-sdk2</string> <string>linkedin-sdk</string> </array> - Make sure you have added App Transport key to enable web services in your App. If it is not present, add the following key to your info.plist file:
<key>NSAppTransportSecurity</key>
    <dict>
        <key>NSExceptionDomains</key>
        <dict>
            <key>linkedin.com</key>
            <dict>
                <key>NSExceptionAllowsInsecureHTTPLoads</key>
                <true/>
                <key>NSIncludesSubdomains</key>
                <true/>
                <key>NSExceptionRequiresForwardSecrecy</key>
                <false/>
            </dict>
        </dict>
    </dict>
Now open your view controller file from where you need to authenticate with LinkedIn. Under your view controller class, define a variable of type LinkedInSwiftHelper and pass all the requred parameters given below:
private let linkedinHelper = LinkedinSwiftHelper(configuration: LinkedinSwiftConfiguration(clientId: "<your client ID>", clientSecret: "<your client Secret>", state: "DLKDJF46ikMMZADfdfds", permissions: ["r_basicprofile", "r_emailaddress"], redirectUrl: "<your redirection URL>"))
- client ID and client secret key can be found in your app console.
- Mention only those permissions which you have check marked under Default Application Permissions section in your app console.
- your redirection URL would be replaced by the authorization URL you have added in your app console.
Now call authorizeSuccess() method of LinkedInSwiftHelper class in order to get the access token which will be useful for fetching profile info from LinkedIn server as defined below:
linkedinHelper.authorizeSuccess({ (token) in

            print(token)
            //This token is useful for fetching profile info from LinkedIn server
            }, error: { (error) in

            print(error.localizedDescription)
            //show respective error
        }) {
            //show sign in cancelled event
        }
If you receive an access token, only then you can request LinkedIn server to send user profile info by calling requestUrl() method of LinkedInSwiftHelper class along with the following parameters:
linkedinHelper.requestURL("https://api.linkedin.com/v1/people/~:(id,first-name,last-name,email-address,picture-url,picture-urls::(original),positions,date-of-birth,phone-numbers,location)?format=json", requestType: LinkedinSwiftRequestGet, success: { (response) -> Void in

            print(response)
            //parse this response which is in the JSON format
        }) {(error) -> Void in

            print(error.localizedDescription)
            //handle the error
           }
Mention only those information related parameters in URL which you want from the LinkedIn server. Also mention the response format like JSON, xml.
Now you have to add following method in your `AppDelegate.swift` file:
func application(_ app: UIApplication, open url: URL, options: [UIApplicationOpenURLOptionsKey: Any] = [:]) -> Bool {

    if LinkedinSwiftHelper.shouldHandle(url) {
        return LinkedinSwiftHelper.application(app, open: url, sourceApplication: options[UIApplicationOpenURLOptionsKey.sourceApplication] as? String, annotation: options[UIApplicationOpenURLOptionsKey.annotation])
    }

    return true
}
If you want the number of connections from the users, add “num-connections” key to the request url.
Now you have all the information related to the user. Use it as per your own requirement.
Thank You for reading us!
 End to End Technology Solutions
