I found this quote by James O. Coplien on Japanese workplace organization methodology called 5S
Clean your workplace on daily basis completely or set cleaning frequency.
Use cleaning as inspection.
Prevent machinery and equipment deterioration.
Keep workplace safe and easy to work.
Keep workplace clean and pleasing to work in.
Just like our organization, the codebase is also our workplace where we work and others have to work and maintain, and it also need to be clean and readable.
Many times I come across codes which are so unorganized that you can’t even read them, you can’t find when a condition starts when ends and when other start. Just imagine if you have to understand and maintain that code.
Well, many of you can say that commenting the code can solve the problem. Sure, commenting code is a good practice but I don’t think it can solve the problem of unorganized code because sometimes comments are not enough and we have to read the code.
So why don’t we write code so that it just not need to be commented.
The Only Truly Good Comment is the Comment You Found a Way Not To Write.
I am not a big code commenter, and I love to read the Robert C. Martin (a.k.a. Uncle Bob) on code commenting:
Why am I so down on comments? Because they lie. Not always, and not intentionally, but too often. The older a comment is, and the farther away it is from the code it describes, the more likely it is to be just plain wrong. The reason is simple. Programmers can’t realistically maintain them.
So, let’s come to the topic, Tailor: Tailor is a Static Code Analyzer and Linter for Swift. It helps to enforce Swift coding guidelines collected from many sources in your code. It helps to code clean and reduce the possibility of bugs.
Installation
To install tailor use following command in terminal:
brew install tailor
If Homebrew is not installed on your system use following command to install it first:
ruby -e "$(curl -fsSL https://raw.githubusercontent.com/Homebrew/install/master/install)"
That’s it Tailor is installed on your system, you can check it with following command:
brew doctor
Integration with XCode Project
Use following command to Integrate Tailor with your XCode Project:
tailor --xcode /path/to/demo.xcodeproj/
This command will add following build script to your project

You can also add the build script directly in your project.
Disable Tailor in source code
You can disable the Tailor for some code snippet.
Disable for a single line
To disable Tailor for a single line use `// tailor:disable` after that line, like:
if(someBoolean == true) { // tailor:disable
}
Disable for a block
To disable Tailor for a block of code write that code within // tailor:off and // tailor:on comments, like:
// tailor:off
extension CreateOrderVC: CreateOrderDisplay {

    // MARK: Display logic
    func displayOrder(viewModel: CreateOrderViewModel) {

        // NOTE: Display the result from the Presenter
        labelOrder.text = viewModel.orderName
    }

    func removedSuccessfully(order: CreateOrderViewModel) {
        labelOrder.text = ""
    }
}
// tailor:on
Configuration File (.tailor.yml)
The behavior of Tailor can be customized with a configuration file name .tailor.yml. We will use this file for following configuration:
- include/exclude some files or directories
- enable/disable some analysis rules
For the simplicity keep the .tailor.yml file in same directory as of the xcproject file of XCode project, otherwise you will need to specify the path of the file with --config option in build script.
Include/Exclude some files or directories
by default tailor analyzes all the file within the root directory of project. If you want to analyze only some files you can use include option in configuration file, and if you want to exclude some files from analysis you can use exclude option for those files.
It is better to exclude Pods directory from tailor analysis.
Example:
include:
    - Sources
exclude:
    - Pods
    - Utilities/ThirdParty
It will analyze all the files in Sources/ directory and exclude the files in Pods/ and Utilities/ThirdParty/ directory.
Enable/Disable some analysis rules
To enable or disable some analysis rules you can use only and except options.
Example: only
only:
    - upper-camel-case
    - trailing-closure
    - forced-type-cast
    - redundant-parentheses
This will only check the given rules.
Example: except
except:
    - trailing-whitespace
    - comment-whitespace
    - forced-type-cast
    - redundant-parentheses
    - lower-camel-case
    - trailing-closure
    - todo-syntax
This will check all the rules except these.
So an complete .tailor.yml file will look something like this:
include:
    - Sources

exclude:
    - Pods
    - Utilities/ThirdParty

except:
    - trailing-whitespace
    - comment-whitespace
    - forced-type-cast
    - redundant-parentheses
    - lower-camel-case
    - trailing-closure
    - todo-syntax
Warning or Error
We can also give the option to treat the violation of rules as error or warning with --max-severity option. by default it is set to warning. If we set the --max-severity to error and any rule violated in our source code then the XCode will mark the build as failed.
Configuring Analysis Mode in XCode (Optional)
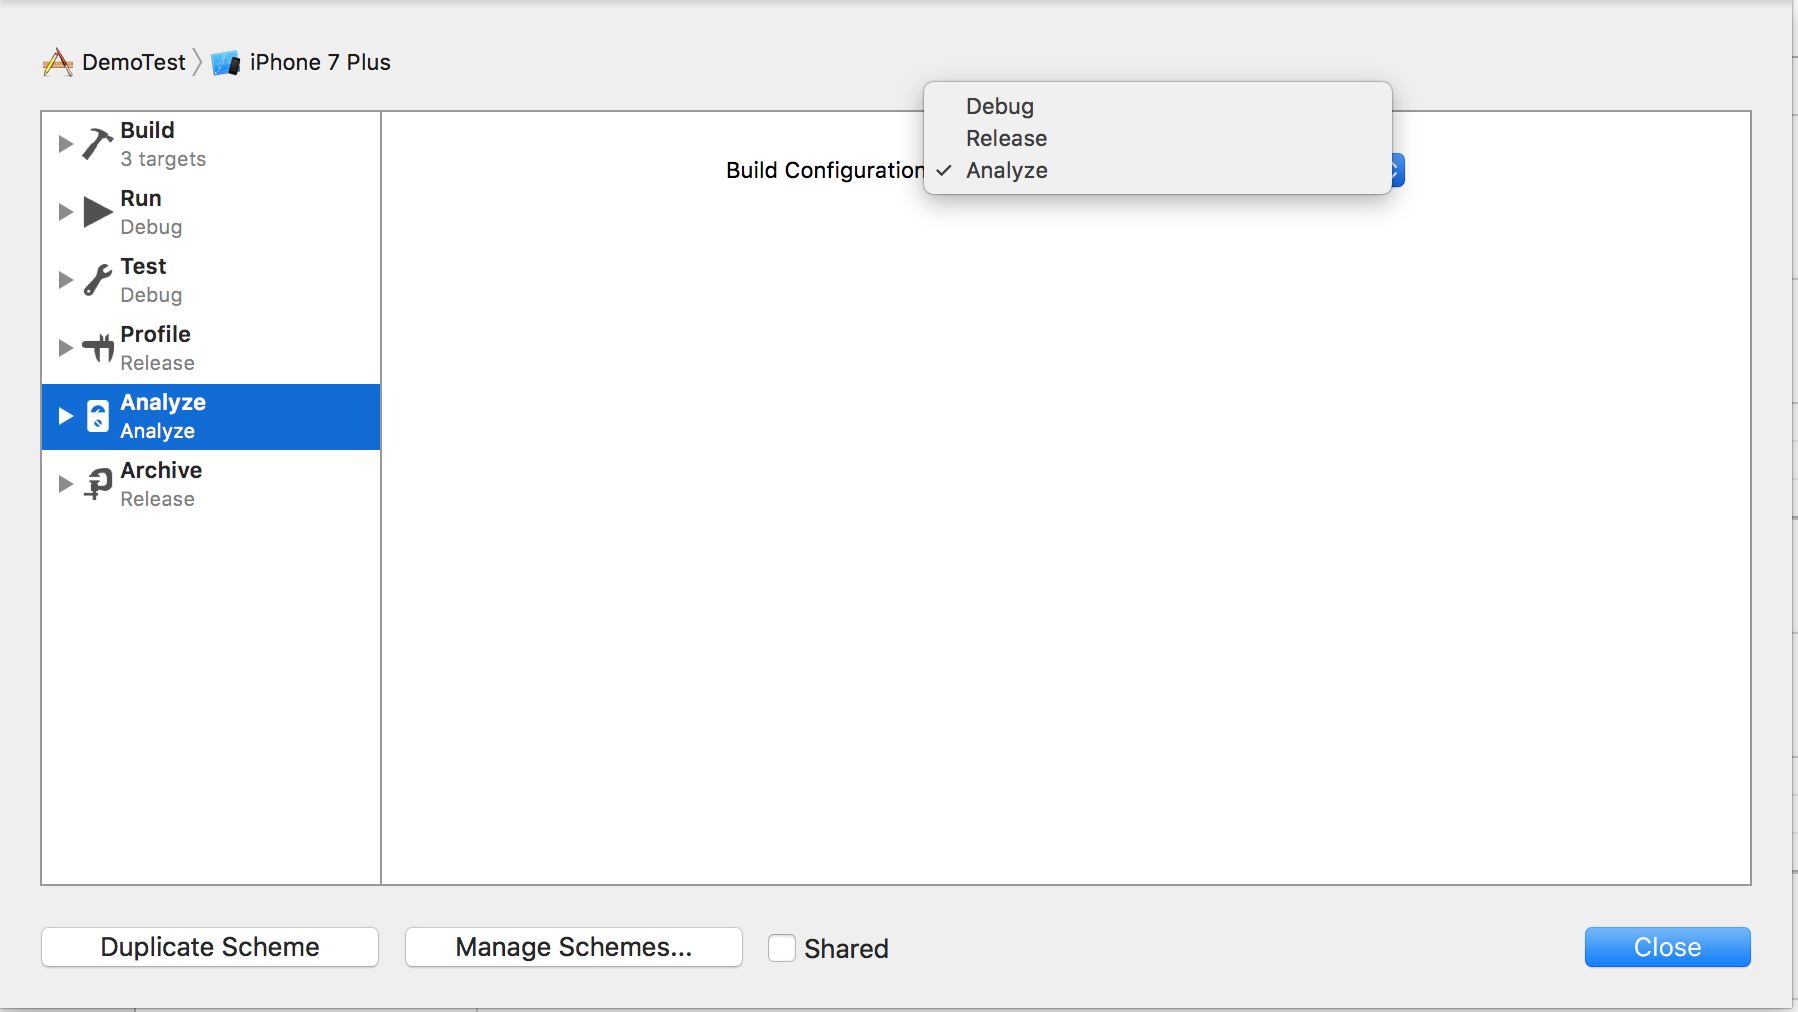
Now we will configure our project to run Tailor only when we build it in Analyze phase.
Add a new configuration Analyze to the project.

Goto Edit Scheme, and in Analyze Phase select our newly created configuration.

Change the tailor build script like this:
if [ "${CONFIGURATION}" = "Analyze" ]; then
    if hash tailor 2>/dev/null; then
        tailor
    else
        echo "warning: Please install Tailor from https://tailor.sh"
    fi
fi
Done, Now Tailor will only run in Analyze mode 🙂 .
 End to End Technology Solutions
